There are countless accessories and components necessary to make a working machine. But there is one fundamental component that it all connects to… the breadboard!
Today we are focusing on how to use a breadboard and all the components that we think you should know about that are used with breadboards.
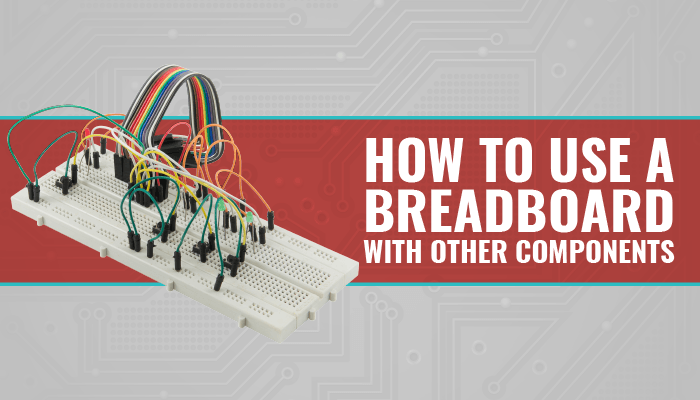
How To Use A Breadboard
A Breadboard is a base component that connects to the Arduino and extends its capabilities substantially. The board itself looks like a cracker, which is why it has such a unique name.
With a breadboard, an Arduino unit, and these components, you can do a lot.
Piezo Buzzer
This piece acts like a tiny little speaker system for your breadboard. Plug it in and it can either be an alarm or a buzzer.
Thus, if you’re trying to make a clock or security system, you can use the Piezo Buzzer to notify you of any changes that occur in the system.
The way that this component works is that it has an electromagnet that drives a thin metal sheet. As such, it’s not a “true” piezoelectric speaker, but it operates similarly.
When & How To Use This Component
The buzzer is a simple and cost-effective device, so you could incorporate it into a variety of projects. Any system that requires a simple sound (like an alarm) can benefit from having a Piezo Buzzer. That being said, there are other dynamic sound options, so this is only useful for beeps and short-form audio.
Learn more about this component by using it to build a motion detector!
LED
Overall, this is a fundamental component of any Arduino system. When you’re first learning how to use the machinery, one of the first projects you can complete is making a light blink on and off. From there, you can improve your skills and learn how to control it or use the light in conjunction with other pieces and materials.
LED stands for light-emitting diode, and this is one of the most straightforward and most reliable forms of light available. It uses two pins to get the current from the breadboard, and you can find them in a variety of colors.
When & How To Use This Component
If you need lights at all, then LEDs are the way to go. Unless you have to utilize a screen or digital readout, LEDs are going to be your bread(board) and butter. Alarms, indicator lights, and anything else you can imagine can benefit from using LEDs.
Ultrasonic Sensor
Have you ever wanted to use echolocation like a bat? Well, with the ultrasonic sensor from Creation Crate, now you can. This device measures the distance to an object based on high-frequency sound waves. It then registers the distance on the device, which can be read via a display of some kind. This is kind of high-tech stuff, so you probably won’t need to use it too often, but it’s nice to know that it’s available.
When & How To Use This Component
If you have to track distances for any reason, then this is a perfect method of doing so. However, keep in mind that you have to have some way of reading the data, so you also need a display screen. It’s a rare project that needs to use this device.
Seven-Segment Display
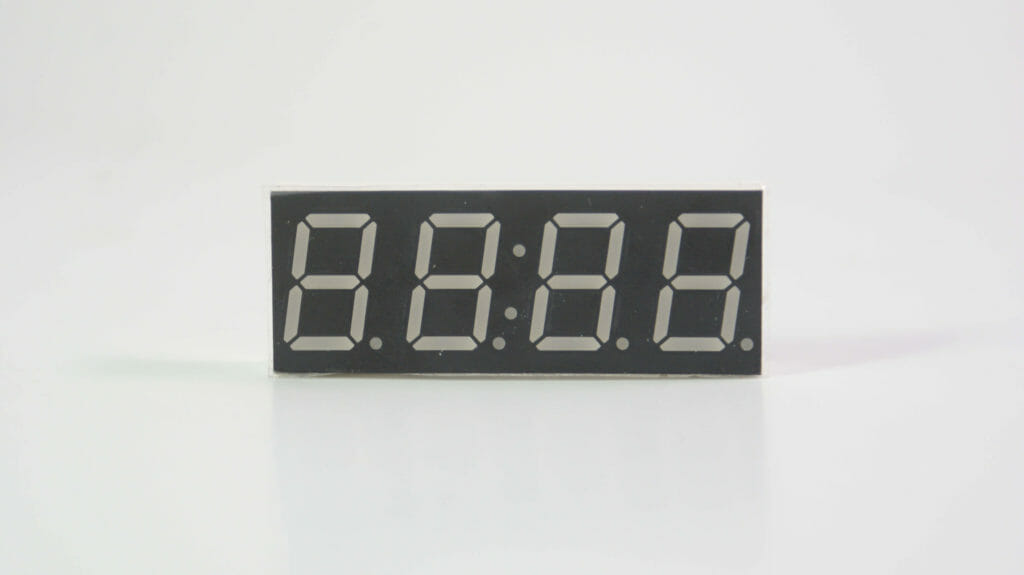
This component looks like a digital clock. It can show you up to four numbers at a time, with decimals and a colon available as well. Thus, if you have to display any kind of numerical value, this is an easy way to do it. While the smaller versions only have four spaces, you can buy additional displays that have more room.
When & How To Use This Component
This is a handy component to have on hand for a variety of projects. You can couple it with the ultrasonic sensor (although we recommend an LCD screen instead), or you can use it to make an alarm clock with the Piezo Buzzer. Many different systems will require some kind of numerical readout, and this display is a simple way to show it.
Standard LCD
Liquid Crystal Displays are all the rage these days, as they can provide crystal clear imaging with a reliable and stable range of colors. In this case, the LCD screen measures 16 characters wide and has two rows. This allows you to show different number sets, such as distances with the ultrasonic sensor.
The LCD is white text on a blue background, and it is backlit for easier viewing. You can also connect the screen to a resistor to dim or brighten it as needed.
When & How To Use This Component
There are a lot of reasons to have an LCD screen on your next project. It offers more options than a standard segmented display, and it can be customized much more easily. You will likely find yourself using this component semi-frequently.
To learn more about this component, use it to build an Arduino Smoke Detector!
Push Button
When learning to program and build different systems, you will understand that a lot of programming uses the “if/then” mentality. By that, we mean that “if” you do something, “then” this other thing will happen. For example, if you push a button, an LED will illuminate.
Push buttons are a crucial and effective way to control different parts of your system. You can also customize them with different colored caps so that you don’t get confused when you have to enter the right data.
When & How To Use This Component
You’ll probably find a use for a push button all the time. Any machine that requires manual input from you (the user) will need a button to get it done. While there are other methods of activating something, buttons are one of the most commonly used.
Microphone Module
Would you want to have a system that is voice-activated? What about something that turns on when you clap? How about a door system that activates when the bell rings? If any of those sound appealing, then you’ll need a microphone module.
This component works by converting sound into a digital readout. While it’s not big enough to register too much tonal differentiation, it’s perfect for systems that require any kind of audio to work.
When & How To Use This Component
There are a few projects that come to mind, such as a doorbell display that activates when someone rings it. Other options include a voice-activated alarm system or a clap-on/clap-off device. It’s not a fundamental tool, but it does give you a lot of options for upgrading to high-tech projects.
Temp/Humidity Sensor
If you’re ever going to build a thermometer or weather station, then you have to use the temperature and humidity sensor. It’s a digital system too, meaning that you don’t have to use analog pins to read the data. It also updates every two seconds, which can be a bit too long, depending on what it’s being used for in particular.
When & How To Use This Component
Any system that requires temperature data. While a weather station is an obvious choice, think outside the box. What about a refrigerator alarm that signals when the temperature is above 41 degrees?
Photoresistor
Using two pins and a photocell, this component allows you to utilize light in your project. The cell registers light and sends a digital signal based on the amount and intensity. You can use multiple sensors in conjunction with each other to get a more comprehensive view of the light being shown, or you can stick with one and have it activate another system when light appears.
When & How To Use This Component
There are a variety of projects that can use light to affect some part of the system. For example, an alarm that sounds when a room light comes on. Like the microphone and temperature sensor, you have to get a little creative with it, but you can use the photoresistor for a lot of reasons.
Servo Motor
When it comes to robotics, you need motors, gears, and pulley systems to make your creation move autonomously. A servo motor is one of the more basic options out there, and it can be utilized for a lot more than just a small robot butler.
The main premise for a servo motor is to allow you to control the speed and duration of the spinning gears. You can use this to do things like open a gate or spin a turret.
When & How To Use This Component
We suggest experimenting with the servo motor to see its capabilities and then come up with an idea of how to use it. Until you’ve mastered the concept, it’s hard to understand what you can do with it.
More Projects You Might Enjoy
Mechanical Engineering Projects From Beginner To Advanced
10 Cool And Challenging Engineering Projects For Kids
The Ultimate List Of Engineering Projects
More Tutorials You Might Enjoy
Best Resources For Learning Electronics