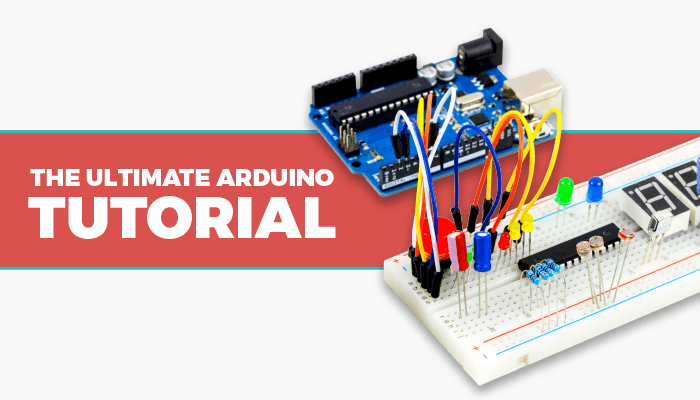
The Arduino is an incredible mini-computer, with a huge range of uses! This simple (yet detailed) Arduino tutorial will explain to you what an Arduino is, and the different models and features available. You will learn how to use the many different functions of your Arduino, and create some really cool projects!
When most people think of programming, they imagine sitting at a computer screen typing lines of code for hours on end. Thanks to the Arduino microcontroller, people are now able to evolve from just being at the computer screen to creating their own automated watering gardens, DIY home security systems, and many more fun DIY electronic projects.
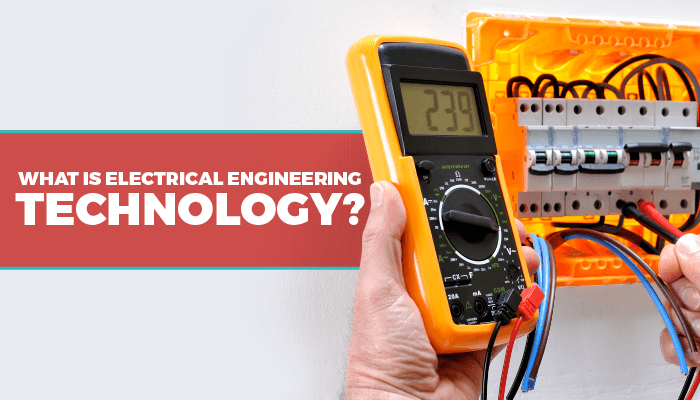
What Is An Arduino?
Arduino, is a company that specializes in open-source software and hardware. They primarily design and manufacture single-board microcontrollers and microcontroller kits. It takes inputs from a variety of sources (i.e., a light, a sound, or a button press) and then turns it into an output.
Since these microcontrollers are open-source, they can be produced and sold by anyone, which is part of the reason why they are so widespread around the world. Also, because anyone can make adjustments and improvements to the system, it’s easy to use and accessible by all.
The best part about having such a large and helpful community is that it’s super easy to find information on how to use your Arduino system. Thus, even if you’ve never touched one before, you can master it in no time.
The History
This program and hardware date back to 2003. At the Interaction Design Institute Ivrea (IDII) in Italy, students got together and started using a basic microcontroller system for learning purposes. However, it didn’t become something close to Arduino until a student named Hernando Barragán developed the Wiring programming language. It’s Wiring that enables Arduino microcontrollers to work as well as they do, and it’s what allows people to build systems without extensive knowledge of programming and electronics.
The first true Arduino system was developed by a team of different students at IDII, named Massimo Banzi, David Cuartielles, Tom Igoe, Gianluca Martino, and David Mellis. They took the Wiring system that Barragan created and turned it into the Arduino that we use today.

The changes that the IDII team made to Barragan’s initial design made it lighter and more accessible. Also, by continuing to promote the open-source elements (which Barragan started), they were able to create a system that almost anyone could use.
By 2011, 300,000 Arduino units had been sold. Two years later, that number jumped to over 700,000.
Why Arduino?
Simply put, this system makes it easy to create all kinds of projects. Children and experts alike can utilize the open-source Wiring language to build a variety of electronics. From games to more practical solutions, Arduino makes it easy to create the kind of products that you want, all for a low price.
Since it’s open-source, Arduino doesn’t have the same restrictions that other tools have. Since you don’t have to buy a license to use the product or agree to terms and conditions, you can use Arduino as you see fit. This low cost of entry coupled with the freedom to build whatever you like is why this system is so widespread and well respected.

Another reason to use Arduino is that it’s compatible with all operating systems. Thus, you can use Mac, PC, or Linux to make more complicated and practical projects. This level of integration means that advanced users can develop all kinds of prototypes that can be used in a variety of industries.
Finally, adapting and improving the Arduino platform is simple thanks to its open-source design. Thus, as you progress in your understanding of programming language, you can update the Wiring system to fit your needs.
Different Types
As you can imagine, when something like this takes off, it’s inevitable that there would be other variations on the base product. Arduino boards come in a few different varieties, and each one can help you make the most out of your next electronics project. Here is a brief overview of them.
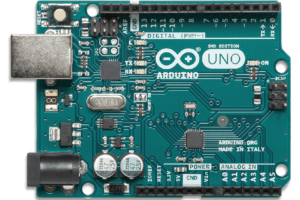
Arduino Uno (R3)
This is the original model, and it provides you with a lot of different programming option s. The features that you can expect to get from the Uno include:
- 14 Digital I/O Pins
- Six Analog Inputs
- Power Jack
- Reset Button
- USB Connector
You can do a lot with the Uno, partially because six of the pins work with pulse width modulation outputs. For the uninitiated, that means that you can adjust analog (physical) inputs and outputs with digital controls. This uses a lot less power and gives you greater customization over what can happen. It’s a powerful tool in the programmer’s toolbelt.
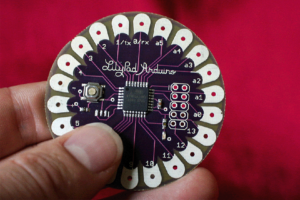
Arduino Lily Pad
This version is unique because it was designed for textiles. If you’ve ever wanted to integrate electronics with clothing and fabrics, then the Lily Pad is the best way to do it. It comes with four input connectors, nine output pins, and a computer connection as well. Best of all, you can sew the Lily Pad into your clothes and wash them without damaging the components!
RedBoard
If you want to program your Arduino through the computer, then the RedBoard is a fantastic option.Rather than connecting and controlling everything manually, you can customize your inputs and outputs with computer software instead. Programs for the RedBoard are available online to help you get started.

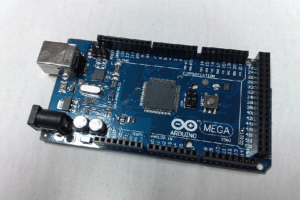
Arduino Mega
Sometimes, you need to connect a lot of different inputs and outputs to make your machine work properly. Fortunately, the Mega Board provides you with a ton of pins, including 14 that can work with PWM outputs. When you’re working on a more complicated project, the Mega can give you the control and versatility you need.
Arduino Leonardo
This system is similar to the RedBoard in that it’s mostly controlled by the computer. It doesn’t offer as many pins and connections, which makes it easier to manage and more cost-effective. The Leonardo is a perfect option for beginners as it can help you focus your attention and build simple devices with a couple of connection points.
Arduino Shields
If you want to add functionality to your device without having to build it yourself, you can buy shields for your microcontroller. There are a ton of different options out there, including those that can help you connect wireless to the internet, control LCD screens, and other processes that would otherwise require more extensive programming knowledge.
As developers create and streamline these shields, you can buy them directly from Arduino and enhance any project you’re working on.
These are just the basic models that Arduino has to offer, but there are many different products out there that you can use. The company sells all kinds of boards, kits, and shields that you can use to create a variety of machines. There is no limit to what you can build when you have the right Arduino tools at your disposal.
How Do I Use An Arduino?
As we’ve mentioned, the level of complexity depends on the kind of board and add-ons you have. However, no matter what type of Arduino you’re using, there are a few steps you have to take before you can begin.
First, you have to download the Wiring programming language. This is what’s going to allow you to use your board for your project. You can find it on Arduino’s website. All you have to do is pick out your operating system and then connect your board to the computer via USB. If your Arduino doesn’t have a USB connector installed, then you will have to connect it to a board that does and download it that way.
Once Wiring is installed, you will have to do a little bit of coding to get set up. You will have to create two void type functions. These can be entered in through your computer. The first will be a setup method, which is where you want to add any initialization steps to your project. The second will be a loop method. The loop will be any code that will be run over and over again while the machine is working.
From there, you will have to use code and analog connections to make your project work. In the next section, we’ll outline how to code in Arduino.
How To Code A Project
Learning this process takes a lot of time and patience, and there is too much information to cover here. Fortunately, there are a ton of fantastic resources online that can go into further detail and help you master the coding system so that you can start making all kinds of projects in Arduino.
Overall, the best way to learn is to use a few tutorials and start with basic projects. We’ll cover a few examples later on, but as you go through them, you will learn the ins and outs of coding. Nonetheless, here is a brief introduction.
- Source: as we mentioned, this is where you want to enter any code that will initialize your project. This section is what will get the Arduino operating the way you want it to.
- Loop: any programming that you want to repeat forever will go here. For example, if you’re going to create a blinking LED, then you will enter the code into this section.
Once you’ve entered the code, you will have to compile it. This can be done through the Wiring software on the computer. When you compile your code, it will check it for errors. When you’re first starting out, you may encounter a few setbacks when trying to execute your project. It’s imperative that you not get discouraged, as it takes patience to get it right.
Assuming that compiling went well, then you have to send the code to the board. Again, this is done through Wiring, so it’s really simple. Once the code reaches the board, it activates, and then the board starts doing what you told it to do.
That’s it! It sounds a lot easier than it is, but as long as you follow the steps, you should be ready to go.
Best Learning Resources
Thankfully, the open-source platform nature of this system enables anyone to provide detailed instructions on how to use it. Here are a few sites that will make it easy to get started with your new Arduino board.
Creation Crate Arduino Tutorials-
- Lesson 1 “Getting Started With Electronics”
- Lesson 2 “Getting Started With Arduino
- Lesson 3 “Getting Started With Coding”
Each of these Arduino tutorials can help you get started with projects, as well as recommend different products that you can use to make the most of your Arduino board.
Recommended Projects
When first learning how to use Arduino, we suggest that you begin with the following five projects. Each project here will have a large selection of Arduino tutorials. Once you’ve mastered these, you’ll be ready to take on bigger and more complicated electronics.
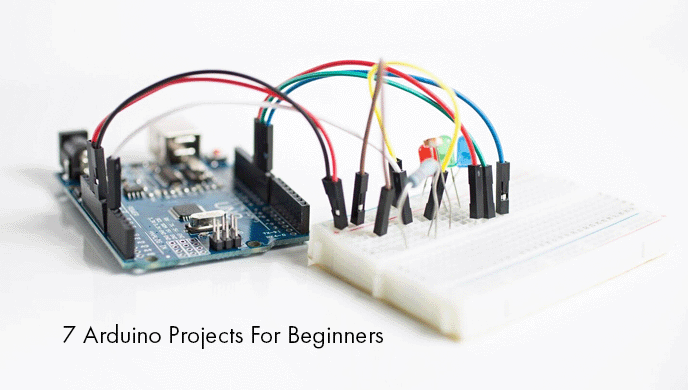
These projects will give you a comprehensive understanding of the coding involved, as well as how you can utilize the Wiring programming language. From there, search online for all kinds of new and fun Arduino tutorials!
More Projects You Might Enjoy
Mechanical Engineering Projects From Beginner To Advanced
10 Cool And Challenging Engineering Projects For Kids
The Ultimate List Of Engineering Projects
More Tutorials You Might Enjoy
Best Resources For Learning Electronics
10 Simple Steps To Learning Electronics
How To Use A Breadboard With Other Components